Quantcast
Channel: Hair Archives - BeautyFrizz
Viewing all 60 articles
Browse latest View live

Why Every Woman Should Try Short Hair in Her Lifetime

$
0
0

Though I’ve always been a fan of drastic hair changes—I’ve never gotten the same cut more than twice in a row—I recently cut my hair short again after about 3 years of sporting various medium to long hairstyles, and it reminded me of all the benefits of having short hair, and why I think every woman should try short hair at least once in her life.

Many women use their hair as a security blanket, hiding behind it to distract from other aspects of their face, body, or even personality about which they may feel self-conscious. This is a conversation I have had with many of my friends—the fear that cutting their hair short would leave them vulnerable, without the protection and comfort of their hair, which has become a sort of quasi-lifetime companion. I have always been of the opinion that pushing yourself out of your comfort zone is an incredibly important part of living a healthy, happy life, and I think ridding yourself of such a significant, physical comfort—though terrifying—is something every woman must try at least once in her life.

shutterstock_281178557

There is not only a physical freeness of having short hair, but there can also be a metaphorical freeness as well. It frees you of a very physical weight (that can sometimes reflect an unconscious emotional weight) that you’ve been carrying around and can lead to a new spiritual lightness. If you’ve found yourself in a rut, either with your beauty routine or your personal life, I cannot stress enough how amazing cutting your hair short will feel.

It will shave off a ton of prep time—it dries quicker and obviously takes less time to style than long or medium-length hair. This will free you up to pursue hobbies that may have fallen to the wayside, or give you the time to try something new! It can be very intimidating but you might even find a hairstyle that you would never have thought would suit you and that you will absolutely love—there are short styles that look good with every face shape—you just have to be willing to take the risk.

The post Why Every Woman Should Try Short Hair in Her Lifetime appeared first on Beauty Tips, Hair Care.


Say Goodbye to Ombré and Say Hello to Colombré

$
0
0

While ombré still looks great and always will, it’s starting to get a little bit old. If you’re looking for something a little more exciting, you need to try the trendy new style of colombré! It’s like the love-child of ombré and the trendy rainbow style, but takes a bit less guts than going full vibrant and colorful with your hair.

Woman with colombre hair

Colombré is pretty much exactly what it sounds like—ombré but with color! Instead of your locks getting lighter with blonde on the bottom, the hair shifts from a natural tone to dyed colors like blue, pink, or purple–or any other color your heart desires! It’s a great way to get creative with your hair, but it’s much more subtle than some of the other bright color trends that have been taking over. This trend also gives you a lot of freedom to choose your colors. Stick to one washed out color, or even go rainbow, just as long as it starts out solid on the top then you’re rockin’ colombré!

It’s pretty perfect timing that this trend is coming up just after the solid pastel trend, because you can just let your hair grow out! No need to re-dye—unless the color is more faded than you’d like—just let your natural color grow out on top. Though I dig just going one color on the bottom, it also looks super cool to do a few different colors going down. There are so many options between colors, brightness, and color combos that it’ll be so much fun to experiment!

Colombré is a nice way to keep a little color as we transition into fall, without being too bright and holding onto summer. It’s just edgy enough to make you stand out, but not so crazy that your grandparents will be shocked. So if you’re feeling tired with your current color, try these sexy new locks and walk around in style.

The post Say Goodbye to Ombré and Say Hello to Colombré appeared first on Beauty Tips, Hair Care.

Hairstyles for Fall

$
0
0

There’s no better time to change up your hair than during the changing of the seasons. So if you’re looking to say out with the old and in with the new as the weather gets a little bit chillier and the sun gets a little bit dimmer, think about trying these trendy hairstyles to rock for fall 2015.

Woman getting her hair cut

Side Part
Maybe you’re not quite ready to cut your locks and want to keep them growing through the colder seasons, but you’re still looking for a bit of a change. That’s where this sleek, 70s inspired style comes in handy. Just flip your hair to the side and start training it to stay in a cute side part. This youthful look will work with any face shape, and though it’s a simple change, it can make a big difference to your overall appearance.

Blunt Bob
Bobs seem to make the list almost every year, but this year the bob is veering away from razor cut edges and angles into a more straight, chunky, and natural style. Instead of straightening your bob to within an inch of its life, let it get some volume and waves and give it an uneven weight with a handy side part. A tousled bob is the way to go for fall 2015, and it’ll look good at any length—weather it’s a shorter chin length look, or a longer shoulder length cut.

Razored Tips
If you’re not looking for a totally new cut, the changing of the seasons is a great reminder that it’s time to get those dead ends looked after. Instead of a typical trim, get your stylist to use a razor. It’ll thin out the ends a little and give your ends a bit more texture for an edgier look. If you’re feeling a tad adventurous, add some long layers to add a little bit of volume. Style in relaxed waves, which is a summer trend carry over that we’re just not willing to let go of yet.

The post Hairstyles for Fall appeared first on Beauty Tips, Hair Care.

Get The Look: Perfect Wavy Hair

$
0
0

Have you always wanted that perfect wavy do or are you looking for a way to change up your style?  Then read on.  Today, we take a look at the best way to achieve complete hair envy with perfectly relaxed curls.

A favorite go-to red carpet look for Sara Jessica Parker, the wavy do is a great way to add that little touch of glamour to any look.  So, without further ado, we bring you the following simple steps to help you get some envy inducing, beautiful curls.


woman with loose curly hair


To get this look we have used both hair dryer with a round brush and a curling wand together with mousse and hairspray.

  • To being, towel dry your freshly washed hair.
  • Starting mid-way down your hair apply some illuminating mousse and work through right to the ends.  This will give your hair some added shine and hold.
  • Then turn your head upside down and let your hair hang down, begin by blasting the roots dry.
  • Using a large round brush continue to thoroughly dry your hair, smoothing out the mid lengths as you go.
  • When completely dry, split your hair into sections working from the nape of the neck up.  Depending on the thickness of your hair, take either 1 inch or 2 inch sections and wrap each section around a curling wand.
  • Continue to do every section of your hair this way.
  • When you are finished curling all the sections of your hair, leave to cool completely.  Then, when cooled, gently pull through the curls with your fingers.
  • And finally, of course, it goes without saying, apply plenty of hairspray for a long lasting, flexible hold.

And there you have it, perfect wavy hair for that perfect way to update your signature look.

The post Get The Look: Perfect Wavy Hair appeared first on Beauty Tips, Hair Care.

Top Tips: Get Hair Straightener Savvy

$
0
0

This may not be quite the news you wanted to read today but this season sees the return of the once indispensable hair straightener.  Whether you like it or not the hair straightener is back with a bang, but this time you won’t have to suffer the poker straight look with otherworldly lifeless ends.  Gone is the singed, charred, heat damaged hair of days gone by, replaced with well-polished, sleek, shiny hair.

Let’s be honest straight hair is probably one of our most wished-for look when it comes to our hair.   Even people with straight hair strive for that all elusive tamed, frizz free beautiful mane, perfect from root to tip.

woman with hair straightener

The GHD or Good Hair Day practically changed women’s lives everywhere with their sleek, ceramic plated electrical appliance that was so easy to use and pretty much performed hair miracles with every single stroke.

Fast forward to now and to the newly improved and re-imagined straighteners hitting the shelves.  The focus now being on hair conditioning technology with both Remington and Mark Hill launching straighteners that have their ceramic plates infused with argan oil to moisturize the hair as you straighten.  That coupled with the newest advancement of refillable straighteners that have separate tanks for water and other moisture-infusing ingredients, our futures are set to be full of the most amazing hair days.

Now, down to business and how to get the best out of your new found love for your straightener:

  • Don’t treat your hair like you are ironing it, avoid pulling down the hair from root to tip, instead use the straightener to finish off your styling by pressing the hair as a finishing touch.
  • Lift and blow-dry the roots for volume then use your straightener from just above the ears working lightly towards the end.
  • Use the straightener to eliminate frizz after blow-drying your hair.  After you have created volume and shape run the straightener over the top layer of your hair.
  • If you are straightening your whole head, never spend more than 10 minutes at it, remember straighteners should be used as a finishing treatment not as a starting point.

Finally, stick to these few easy moves for perfectly preened hair:

  • Prep your hair with a leave-in primer or conditioner.
  • Start roughly an inch away from your roots to keep your blow-dry volume.
  • Finish about an inch from the tips to avoid ugly blunt ends.
  • Don’t clamp the straightener or tug downwards and never stop on the way down or you will get unsightly kinks in your hair.

So, whether you consider the hair straightener an indispensable savior or just a necessary evil, they are hot again!!

The post Top Tips: Get Hair Straightener Savvy appeared first on Beauty Tips, Hair Care.

Winter Hair Fixes: Braving Braids

$
0
0

It’s that time of year where we struggle every morning to come up with a way of having a good hair day and, of course, for it to last all day.  What with the rain, storm forced winds, sleet and snow, you name it, your hair goes through a constant battle with the elements.

So, what to do?  Well we think opting for braids is one great way to tame the locks.  Now, don’t panic, we are not talking Pippi Longstocking, 12 year old girl braids, we are talking grown up, sophisticated braided chic.


woman with single braid in hair


To achieve a great braided look that will last, your hair needs to have a bit of texture.  One word: product.  Opt for products that give your hair texture and body as well as gently cleansing and hydrating your hair.  Achieving good condition will give your hair some grip and a longer-lasting braid.

  • Begin by keeping your hair loose around the head.
  • Start at the nape of the neck and braid right down the length of your hair.
  • Secure the end of the braid with an elastic and carefully pull the hair loose to add movement and casual texture.
  • For a final touch, spritz hair with extra hold hairspray to give the style staying power.  Non-sticky hairspray also helps control those flyaway hairs and gives humidity-resistant flexible hold.

And that’s it.  Not a Pippi Longstocking in sight.  Whether your hair is medium in length or falls down your back we think braids are brilliantly versatile.  They work just as well for daytime as they do for a great night out.  Depending on your mood and your styling products, they can be sleek and elegant or casual and full of texture.


The post Winter Hair Fixes: Braving Braids appeared first on Beauty Tips, Hair Care.

What are the Recent Summer Hair Trends?

$
0
0

Short fringe

If you are ready to mix it up with your hair style or color, take a look at some of the trends that are popping up for this summer.

Trending Colors

  • If you want to be bold, apparently one of my favorite summer treats is now a trending hair color. Watermelon!  The combination of bright green and vivid pink are one of the most get-noticed hair colors now.
  • If you want to stay professional-looking, it is a look they are calling “flamboyage”, a technique that combines ombre and balayage styles to brighten up the look but still staying within the natural hair hues.
  • If you want to keep it “real”, they are introducing “nude hair” which is a blend of cool and warm colors so that the overall look ends up being neutral in tone.
  • Other trending colors include snowlights (shimmery white blonde highlights), dusty denim blue, rose gold, and warm buttery blonde.

Trending Styles

  • Super straight locks are back. It’s time to trade that curling iron for the flatiron.  Some of the looks are sleek and almost glassy while others were popping up slightly messy but without any waves.
  • If you want to be super-bold, buzz cuts are showing up on the runways too. Talk about your low-maintenance option.
  • Not sure how I personally feel about this one, but some of the runways were debuting “choker hair” with the ends of the hair tucked into scarves and chokers.
  • If you have been looking to add bangs to your hairstyle, the short fringe is back. The look seems to be messy and less perfect in most of the shows though.
  • For something easy that requires much less commitment, the “pun” is on.  It is a slightly sloppy mix of ponytail and bun.

The post What are the Recent Summer Hair Trends? appeared first on Beauty Tips, Hair Care.

“No Poo”and “No Co-Wash” Hair Care Trends

$
0
0

beautiful hair

It does sound crazy, but two of the latest hair care trends are “no-poo” and “co-wash”.  These trends translate into “no shampoo” and “conditioner wash” basically.

No-poo – It isn’t as daunting as it sounds.

  • Many are choosing this method because (a) it can save a significant amount of money, depending on what brands you are using and (b) you will significantly reduce the number of chemicals you are exposing yourself to.
  • There are two main methods that people are using, water only and baking soda plus apple cider vinegar (also referred to as ACV).
  • The water only method is just that, still going through the motions of shampooing but using only water and massage.
  • The baking soda and apple cider vinegar method is a little more involved but no more so than the shampoo and conditioner cycle. Dissolve about a tablespoon of baking soda in a cup of water and massage it in as you would with shampoo, then rinse.  If you tend to have a dry scalp, an ACV solution will help cleanse and moisturize your hair.

Co-wash – This one seems a little more realistic.

  • You will basically be ‘shampooing’ your hair with conditioner.
  • After completely saturating your hair, apply a generous amount of your chosen conditioner. Massage this into your hair and scalp as you would with shampoo.  At the end of your shower, rinse and then style as normal.
  • With this method, you may find that you need a clarifying shampoo every two to four weeks, depending on your hair and scalp.

Just be forewarned, if you are interested in trying one of these methods, there is an adjustment period as your hair learns how to behave without that constant cycle chemicals!  But it will feel worse than it looks.

The post “No Poo”and “No Co-Wash” Hair Care Trends appeared first on Beauty Tips, Hair Care.


Looking Good on the Ski Slopes

$
0
0

Woman skiing
How often have you breathed in that cold air as you swoop down the slopes, and felt the spray of fine white powdery snow on your cheeks?  You step off the slopes and in front of a mirror, and find that instead of looking like a rosy-cheeked ski bunny, you look like a chapped, flushed mess of a human with your hair both matted to your scalp and tangled beyond measure.

Here are a few tricks to making sure that you can stroll straight from the black diamond run to the lodge and still look ready to glow.

  • In advance, a hydrating mask will help protect and nourish your hair. While on the slopes, try pinning your hair into a low bun or braiding it down your back.  That will help keep the tangles to a minimum and will help camouflage that flatness from your helmet.
  • We know to wear sunscreen on a regular basis, but when you are facing the direct sun from above and the reflected sun from the snow, it is more essential that ever. Plus it helps reduce the goggle tan that has snuck up on all of us.
  • Never go to the slopes without your lip balm containing SPF of at least 15. The sun and the cold and the wind all combine into one set of painfully chapped lips.  Make it tinted and you are a step ahead of the game!
  • Waterproof eyeliner and waterproof mascara can go a long way to making you look polished in the après-ski lounge. Adding a few quick swipes of a foundation stick can help blend away the redness, and your skin will glow without looking overly made up.

Do you have any personal tricks for looking your best on the slopes?

The post Looking Good on the Ski Slopes appeared first on Beauty Tips, Hair Care.

What’s All the Fuss With Cleansing Conditioners?

$
0
0

Woman washing her hair in bathtub

I don’t tend to write a lot about hair care because I just don’t know much about it. I have a wash-and-wear hair style; I don’t color or heat style, and I only get it cut once every quarter. It’s long and fine so I do have to be a little careful with it because it breaks easily. I was recently told by the hairdresser that it was due to nightly ponytails – the holder was causing the breakage. So I have mostly switched to a bun; we shall see if that evens out the stress points!

I’m a recent convert to cleansing conditioners. For a long time, I was hesitant to try them because I worried that they would weigh down my fine hair. But I was wrong. With the right product, it leaves my hair clean and full and shiny. I tried several different brands, including the very expensive infomercial brand, and finally settled on Ren Pure Vanilla Mint Cleansing Conditioner. I tried their lavender version but wasn’t thrilled with the scent even though I love lavender.

There are several advantages to using a cleansing conditioner, also known as co-washing.

Time Saving
It really is a one-step shampooing process. Instead of having to shampoo and condition, it is a much quicker process! Simply massage the recommended amount into your scalp and hair, and leave it while you complete the rest of your shower tasks. At the very end, rinse thoroughly and rinse again. Side note: I have found that for my hair, I rarely need the full recommended amount.

Money Saving
You have also eliminated the need to purchase all of those extra products.

Hair Saving
Without harsh lathering agents, the cleansing conditioners nourish and moisturize the hair.

The post What’s All the Fuss With Cleansing Conditioners? appeared first on Beauty Tips, Hair Care.

Why You Should Rock Sand-Art Hair This Summer

$
0
0

Any kid who grew up in the 90s remembers sand-art. I personally had a very tumultuous relationship with these strange bottles of sand. They were a go-to present for a few years, as everyone in my life seemingly had no idea what else to get for a pre-teen girl. Dumping colourful sand in a bottle and making cool designs would be fun for a bit, and I’d admire my work for a while before I’d inevitably drop the bottle and ruin it, spilling sand all over myself and my surrounding. So, needless to say, the mention of sand-art or anything remotely similar to it has always been subtly anxiety-producing for most of my adult life.

I can't look without cringing
I can’t look without cringing

Until now.

shutterstock_221627242 shutterstock_248904043

Stylist and colorist Rebecca Taylor had the brilliant idea of taking the look of sand-art and transferring the canvas to the human head, and the results are absolutely beautiful. Teaming up with professional hair-color brand Pravana, Taylor debuted the look to promote Pravana’s Vivids Locked-In line of products. The finished product looks like the ombre trend and the rainbow-hair style had a baby, and it absolutely blows my mind. It’s truly a wonderful collaboration between style and art, giving colorists the opportunity to let their creativity and talent shine. Not to mention it gives the client the chance to literally light up any room they walk into.

This trend is the perfect answer to the grey and washed out color trends that have been making the rounds for the last year. With the vivid colors of sand-art hair, you’ll definitely stand out over the dull grey-tones and set yourself apart. It’s perfect for the summer season, as the beautifulcolors shine and sparkle in the sun, and you’ll be sure to make a splash on the beach. The look is quickly popping up all over Instagram and Pinterest, and you can bet it won’t take long before the most stylish of celebs give a try too. So wow your friends now, and get in on this trend before it really blows up!


Why Every Woman Should Try Short Hair in Her Lifetime

$
0
0

Though I’ve always been a fan of drastic hair changes—I’ve never gotten the same cut more than twice in a row—I recently cut my hair short again after about 3 years of sporting various medium to long hairstyles, and it reminded me of all the benefits of having short hair, and why I think every woman should try short hair at least once in her life.

Many women use their hair as a security blanket, hiding behind it to distract from other aspects of their face, body, or even personality about which they may feel self-conscious. This is a conversation I have had with many of my friends—the fear that cutting their hair short would leave them vulnerable, without the protection and comfort of their hair, which has become a sort of quasi-lifetime companion. I have always been of the opinion that pushing yourself out of your comfort zone is an incredibly important part of living a healthy, happy life, and I think ridding yourself of such a significant, physical comfort—though terrifying—is something every woman must try at least once in her life.

shutterstock_281178557

There is not only a physical freeness of having short hair, but there can also be a metaphorical freeness as well. It frees you of a very physical weight (that can sometimes reflect an unconscious emotional weight) that you’ve been carrying around and can lead to a new spiritual lightness. If you’ve found yourself in a rut, either with your beauty routine or your personal life, I cannot stress enough how amazing cutting your hair short will feel.

It will shave off a ton of prep time—it dries quicker and obviously takes less time to style than long or medium-length hair. This will free you up to pursue hobbies that may have fallen to the wayside, or give you the time to try something new! It can be very intimidating but you might even find a hairstyle that you would never have thought would suit you and that you will absolutely love—there are short styles that look good with every face shape—you just have to be willing to take the risk.

Say Goodbye to Ombré and Say Hello to Colombré

$
0
0

While ombré still looks great and always will, it’s starting to get a little bit old. If you’re looking for something a little more exciting, you need to try the trendy new style of colombré! It’s like the love-child of ombré and the trendy rainbow style, but takes a bit less guts than going full vibrant and colorful with your hair.

Woman with colombre hair

Colombré is pretty much exactly what it sounds like—ombré but with color! Instead of your locks getting lighter with blonde on the bottom, the hair shifts from a natural tone to dyed colors like blue, pink, or purple–or any other color your heart desires! It’s a great way to get creative with your hair, but it’s much more subtle than some of the other bright color trends that have been taking over. This trend also gives you a lot of freedom to choose your colors. Stick to one washed out color, or even go rainbow, just as long as it starts out solid on the top then you’re rockin’ colombré!

It’s pretty perfect timing that this trend is coming up just after the solid pastel trend, because you can just let your hair grow out! No need to re-dye—unless the color is more faded than you’d like—just let your natural color grow out on top. Though I dig just going one color on the bottom, it also looks super cool to do a few different colors going down. There are so many options between colors, brightness, and color combos that it’ll be so much fun to experiment!

Colombré is a nice way to keep a little color as we transition into fall, without being too bright and holding onto summer. It’s just edgy enough to make you stand out, but not so crazy that your grandparents will be shocked. So if you’re feeling tired with your current color, try these sexy new locks and walk around in style.

Hairstyles for Fall

$
0
0

There’s no better time to change up your hair than during the changing of the seasons. So if you’re looking to say out with the old and in with the new as the weather gets a little bit chillier and the sun gets a little bit dimmer, think about trying these trendy hairstyles to rock for fall 2015.

Side Part
Maybe you’re not quite ready to cut your locks and want to keep them growing through the colder seasons, but you’re still looking for a bit of a change. That’s where this sleek, 70s inspired style comes in handy. Just flip your hair to the side and start training it to stay in a cute side part. This youthful look will work with any face shape, and though it’s a simple change, it can make a big difference to your overall appearance.

Blunt Bob
Bobs seem to make the list almost every year, but this year the bob is veering away from razor cut edges and angles into a more straight, chunky, and natural style. Instead of straightening your bob to within an inch of its life, let it get some volume and waves and give it an uneven weight with a handy side part. A tousled bob is the way to go for fall 2015, and it’ll look good at any length—weather it’s a shorter chin length look, or a longer shoulder length cut.

Razored Tips
If you’re not looking for a totally new cut, the changing of the seasons is a great reminder that it’s time to get those dead ends looked after. Instead of a typical trim, get your stylist to use a razor. It’ll thin out the ends a little and give your ends a bit more texture for an edgier look. If you’re feeling a tad adventurous, add some long layers to add a little bit of volume. Style in relaxed waves, which is a summer trend carry over that we’re just not willing to let go of yet.

Different Kinds of Curly Hair – and How to Make the Most of Yours

$
0
0

Did you know that curly hair can be categorized into three different types?

You may be wondering…

Why does this matter?

Well, if you know exactly what type of curls you have, you can then tailor your hair care routine to one that really suits your specific hair type, and truly make the most of your beautiful curls.

Figuring Out Your Curl Pattern

The three different types of curls out there generally refer to three main curl patterns, and this is easiest to determine when your hair is healthy, moisturized and in its most natural state.

Do you regularly use heated tools on your hair?

If so, your hair is likely to have suffered from some heat damage, so you would be best off refraining from using heated tools for a couple of months in order to really get a good idea of your curl type.

If the roots of your hair seem much curlier than the ends, then this is a sign that your hair has experienced heat damage. The only way to really figure out your curl pattern is to give your hair some time to heal, allowing your natural curls to come back in while cutting away any damaged ends.

Wavy Hair

The first type of curly hair is wavy hair, which is also referred to as Type 2, and this tends to be defined by S-shaped waves rather than tighter curls.

However, wavy hair in itself can actually be further categorized into three separate types…

The first is Type 2A. This type of wavy hair features a loose and gentle bend.

Hair type 2A

The second type is Type 2B. If this is you, your hair tends to be straighter at the roots, and then turns into more defined waves around eye level.

Hair type 2B

Finally, there is Type 2C. These waves start right at the roots, and are extremely defined, with some intermingled ringlets.

Hair type 2C

Styling Wavy Hair

When it comes to Type 2A and Type 2B, you should not have too many problems in terms of styling. However, Type 2C tends to be the hardest to style, as this hair type is usually more resistant to tools and products.

One problem that all wavy hair types share is frizz, but this can be controlled with the use of hair products. Make sure that the products you choose not only calm any frizz, but also hold your waves without weighing them down. Try using your fingers to scrunch these products through your hair, as this will help to define your waves a bit more.

A few must-use styling products include:

  • Mousses
  • Leave-in serums
  • Heat protecting products
  • Sea salt sprays

Try to avoid using creams or gels as much as possible, and keep your hands away from your hair.

Why?

Beceuse the more you play with it and tousle it, the more it will frizz up.

Curly Hair

Curly hair, also known as Type 3, is full bodied, easily prone to damage, and climate dependent, meaning that the more humidity it experiences, the frizzier it will be.

Just like with wavy hair, curly hair can be split into three further types…

To begin with, there is Type 3A, which refers to larger curls.

Hair type 3A

Next up is Type 3B, which would be medium sized curls, about the circumference of a marker pen.

Hair type 3B

Finally, there is Type 3C, which are tighter, corkscrew curls, and tend to have more volume than the other two curl types.

Hair type 3C

Styling Curly Hair

Curly hair tends to be the most temperamental type of hair, which can make styling quite the challenge. Using too much product will leave your hair with a greasy sheen, while using too little product will result in a head full of frizz.

To help you to care for and style your curly hair, here are a few tips:

  • If you use a conditioner to de-tangle your hair, try using just your fingers instead. This will cause less breakages, and makes the job slightly easier.
  • Curly hair is prone to drying out easily, so use a shampoo that is free of sulfates, followed up with a light moisturizing conditioner 
  • If your sulfate-free shampoo still seems to be too harsh for your hair, try diluting it with a bit of distilled water
  • Be gentle when shampooing your hair, working your way through small sections at a time. Make sure that you never rub or scrub at your hair, and avoid piling it all on top of your head while shampooing
  • When using styling products on your hair, always make sure that your hair has been cleaned, conditioned and moisturized, so that you are beginning with a fresh palette

While everybody should be deep-conditioning their hair once in a while, those who have Type 3C hair should try to do this once a week, as this will help to retain elasticity.

Another way to retain moisture while reducing frizz is by sleeping on a silk pillowcase. This causes less friction than a cotton pillowcase would each time your hair rubs against it, preventing any snags and bunches from occurring.

If your curly hair seems to get tangled far too easily, it may be worth trying a pre-shampoo treatment. This is a formula that you add to your hair before shampooing it, and can really help to de-tangle your hair after it has been washed.

Kinky Hair

Kinky hair is referred to as Type 4, and this hair type is tightly coiled and wiry. It is also quite fragile and delicate, and, being naturally dry, needs some extra moisture on a daily basis. This helps to give it some elasticity to keep it supple, preventing breakages.

When kinky hair is wet, the curls do not appear to be defined, and then, once it dries, there is quite a bit of shrinkage, and the curls take on a fluffier feel.

Kinky hair can be broken down into three further types…

The first is Type 4A, which consists of small and tight S-shaped curls.

Hair type 4A

The curls of Type 4B tend to have more of a Z-shape, as well as a softer, cotton-like feel.

Hair type 4B

Finally there is Type 4C, which still features Z-shape curls, but not in a very defined way. This hair type can be quite varied, being everything from fine and soft to coarse and dense.

Hair type 4C

Styling Kinky Hair

As mentioned above, kinky hair is extremely prone to dryness, so it does need daily moisture.

The reason for this is because the natural oils that are created by the scalp have a much harder time navigating their way through the kinks and twists of curly hair, compared to the easy path of straight hair.

A few products that you can use on your hair include:

  • Moisturizing cleansers
  • Hydrating conditioners
  • Rich hair creams
  • Moisturizing oils, such as jojoba and coconut
  • Leave-in treatments that contain humectants

In terms of actually styling your hair, Type 4 curls work really well with braid-outs, twist-outs and updos.

Why?

Because this hair type is actually quite pliable and will hold a style much better than Type 3 curls will.

You could also try a few protective hairstyles, which basically conceal the ends of your hair, so that any breakages are minimized. These styles include mini-twists and pompadours.

When it comes to hair growth, many people with kinky hair feel as though their hair just does not seem to grow fast enough.

However, kinky hair actually grows at the same rate as other hair types, but, since the hair is so tightly coiled, it can take much longer to visually see this added length. You will know that your hair needs a trim when the ends start to tangle together easily.

Curl Porosity

In addition to understanding your hair type, you should also be aware of curl porosity.

This may sound complex, but it isn’t…

It basically refers to the rate at which your hair is able to suck up liquids.

No idea how porous your hair is?

Fortunately, there is a quick test that you can do…

Dunk a bit of hair into a cup or bowl of water, and then see whether it floats or sinks:

  • Floats – this means your hair is non-porous, and does not easily absorb product. You need to use heavier creams to help the ingredients sink in, and should be deep conditioning your hair on a weekly basis, as it will need the extra moisture.
  • Sinks this means that your hair is highly porous and will drink up liquids easily. You are best off using lighter products that are water-based, as well as products that are rich in proteins.
  • Somewhere in the middle your hair is likely to be healthy and bouncy, as this is considered to be the ideal porosity. A moisturizing shampoo and conditioner should be all you need to maintain your healthy locks.

Curl Elasticity

As you will have probably guessed, curl elasticity refers to how quickly your curls coil back into place when stretched out.

Why does this matter?

Because if your curls do not coil back quickly or easily, this means that they do not have much elasticity and could do with quite a bit more moisture.

Curl Variance

Another issue that many people with curly hair face is curl variance, meaning that their hair consists of more than one type of curl.

This can make it trickier to style, but there is no reason why you cannot use a bit more product in the sections of your hair that feature stronger curls. You can also use more than one hair product, applying specific ones to the parts of your hair that need them.  

Co-Washing

Co-washing is something that many women with curls swear by.

Never heard of it before?

Co-washing stands for conditioner washing, which basically means washing your hair with a conditioner instead of a shampoo.

You are probably wondering why someone would do this…

Well, this is actually a great way to help curly hair retain moisture, without stripping hair of its natural oils. Conditioners do also contain a small amount of cleanser, meaning that they will still be able to wash your hair. 

However, if you have naturally oily hair, or suffer from a scalp condition such as dermatitis, then co-washing is something you are best off avoiding.

For everyone else, try co-washing your hair in between regular washes, and see if this makes a difference to how hydrated your hair is.

Straightening Curly Hair

Of course, there will always come a time when you want to mix up your style a bit, and may decide to do this by straightening your hair.

curly hair straightened before and after

However, if you do not do this with great care, you can end up causing so much heat damage to your hair, some of which may be irreversible.

Here are a few tips to keep in mind when straightening curly hair, no matter which type of curls you may have:

  • Make sure that your hair has been moisturized before beginning, and is also completely dry
  • Straighten your hair in sections, so that you can properly reach your roots
  • Nourish your hair as you go along, either with a heat protection spray or a light oil
  • Invest in quality straighteners so that you do not have to repeatedly go over the same section
  • Hold your hair taut as you straighten it, because tension is essential when straightening curly hair 
  • Use a finishing product to add some shine and reduce any frizz

While alternating between straight and curly hair can be fun, you need to try to keep this to a minimum as much as possible.

Why?

Because curly hair is already so prone to damage, which you really do not want.

As long as you keep your hair dry and protected, your straight hair should last for at least a couple of days, after which you should go back to being curly for a while.


Top 16 Botanicals for Healthy Hair

$
0
0

Botanicals have been a huge buzzword lately, basically referring to compounds that have been derived from plants. In addition to boosting your health when consumed orally, and improving your complexion when used topically, botanicals can also work wonders when it comes to your hair.

Horsetail

Many people have never heard of horsetail, but this grassy-smelling herb is commonly grown in North America, and has been used for thousands of years in a number of different health concoctions.

One of its key benefits is the fact that the stem of this plant contains high levels of silica.

Silica is essential when it comes to the formation of protein in the hair, not only encouraging new hair growth but also repairing any damaged hair tissue along the shaft. This also strengthens the hair, while protecting it from pollution and UV rays.

Hair care brands caught on to the power of silica a long time ago, and you will find it included in a wide range of different hair products. However, this tends to be silicon rather than silica.

Wondering what the difference is?

Silicon only gives your hair an artificial shine, and actually causes quite a bit of damage if it comes into contact with heat. 

Rosemary

Rosemary is one of the top botanicals out there when it comes to the health of your hair, and has been used for hair care purposes for thousands of years.

What exactly does rosemary do for the hair?

Well, to begin with, this aromatic botanical contains so many different antioxidants, one of which is a chemical known as carnasol. This rich antioxidant helps to fight the free radicals that cause your hair to thin and gray.

Rosemary also contains properties that invigorate the hair, adding shine while reducing any dandruff, and treating dry scalp issues.

rosemary

However, one of the main benefits that rosemary has is with hair growth…

Research has shown that, when combined with other botanicals, rosemary has the potential to increase hair growth by over 20%, while boosting microcirculation, which promotes healing. 

While there are many hair care products out there that are formulated with rosemary, try using this botanical in its essential oil form for quicker results.

Ginseng

A popular Chinese herb, ginseng is known for its stimulating abilities, applying this to everything from the brain to the nervous system to the scalp.

When it comes to the hair, there have been a couple of studies carried out on the effects of ginseng, and both of them produced positive results. 

Here are a few of the effects that researchers found ginseng to have:

  • An increase in hair thickness
  • An increase in hair density
  • A reduction in hair loss
  • A reduction in dandruff

Thanks to these scientifically proven properties, ginseng is a common ingredient in hair care products, but you can also take ginseng supplements if you would like to boost its effects.

Ashwagandha

One of the most powerful herbs in Ayurvedic healing, ashwagandha is commonly referred to as an Indian ginseng, because they share similar properties.

The plant itself is a shrub, with yellow flowers and red fruits, and it tends to be the fruit and the roots that contain the most potent compounds.

One of these compounds is tyrosine, which is an amino acid.

What does this do?

Firstly, it is able to prevent the loss of melanin, meaning that it can prevent premature graying.

It also contains antioxidants that do everything from strengthening the hair to treating scalp psoriasis and dandruff.

Fenugreek

A member of the pea family, fenugreek is an aromatic spice that works wonders on hair.

How?

It actually makes a great alternative to store-bought conditioners, because fenugreek seeds have such a high mucilage content. This basically coats each strand of hair in the same way that a traditional conditioner would, nourishing your hair while giving it an added layer of protection at the same time.

Just like a conditioner, fenugreek also helps with de-tangling, while softening your hair and giving it a natural bounce. 

Lavender

You have likely already heard of lavender, and maybe also use products that contain this beautifully scented botanical.

Lavender oil

However, it is not just its scent that makes lavender such a top class ingredient for your hair…

Lavender is a great herb to use for those who suffer from alopecia.

Not sure what this is?

It is a condition that causes the abnormal loss of hair. It can be triggered by a variety of different factors, from genetics to a poor diet to hormones.

Of course, if you suffer from alopecia, it is important to spend some time determining its root cause. But, in the meantime, lavender makes a great aid.

How?

By encouraging your hair follicles to produce new hairs more quickly, while also ensuring that the new hairs produced are thick and strong.

Another common issue with hair loss is that hair follicles often reject hair, thinking that they are foreign objects. Lavender has the ability to prevent this from happening, making it a great remedy for baldness

Do you already have a bottle of lavender essential oil at home? 

Try mixing this with a carrier oil, such as jojoba oil, and then applying this to any split ends, as this will make them less visible and they will look so much healthier.

Nettle

The majority of gardeners out there would consider nettles to be nothing more than an annoying weed, but this plant has some incredible properties.

In addition to boosting your health in a number of different ways when consumed, nettles also make a great ingredient for hair care.

Why?

Because they have the ability to stimulate the scalp, and therefore boost blood circulation, keeping your hair looking and feeling so healthy.

Nettles are also able to inhibit the enzyme that causes hair loss, making this a great remedy for that condition.

How should you use nettles?

Either purchase them in oil form, or make an oil yourself, and then apply this directly to your scalp. You could also give nettle supplements a try, as these will help to nourish your hair from within.

Aloe Vera

Aloe vera is an ingredient that is commonly used as a carrier for other botanicals.

Why?

Because its structure is extremely similar to that of keratin, which is the main protein that makes up your hair.

Aloe vera also contains salicylic acid.

This is an ingredient commonly used in skin care, because it is a gentle but effective exfoliant. When it comes to your hair, these exfoliating enzymes dissolve any dead skin cells, as well as excess oil, both of which can clog up your hair follicles.

Aloe vera is also extremely hydrating and nourishing, meaning it will give your hair a general boost. 

Sage

Sage is a herb that can be found in kitchens all over the world, as it really adds a distinct flavor to dishes.

For thousands of years, cultures all over the world have believed sage to have curative properties, and studies are now able to back this up.

In addition to being an antiseptic, antibiotic and anti-allergy ingredient, sage also contains the following nutrients in high amounts:

  • Magnesium
  • Zinc
  • Potassium
  • Vitamin C
  • B vitamins

Your hair needs all of these in order to be strong, making sage a great ingredient to use.

sage

Wondering how to use it?

There are a few different ways, but the easiest is to create a tincture with dried leaves, and then massage this into your scalp, just like a normal hair treatment.

Marshmallow Root

While marshmallows today consist primarily of sugar, they were traditionally made from a plant that was native to Europe, North Africa and Western Asia.

It is the root of the plant that has long since been revered for its medicinal properties, and has been used as a remedy for coughs and colds for so many years.

What makes it so potent?

Well, just like with fenugreek, marshmallow root contains a high amount of mucilage, which is a slippery substance that works in the same way as a traditional conditioner.

Marshmallow root also contains soothing and cooling properties, making it a great treatment for itchy scalps.

In general, the natural proteins within marshmallow root also boost the health of your hair, nourishing it and giving it an intense shine.

Flaxseed

Flaxseed is an ingredient that everybody should be including in their diets, as they are packed with omega-3 fatty acids.

These omega-3 fatty acids are essential for healthy hair, as they increase elasticity, which therefore reduces any breakages.

Flaxseeds are also filled with all of the vitamins and minerals that your hair needs in order to thrive.

Burdock

The burdock plant is one that is native to Europe, but has been naturalized in North America. This plant belongs to the thistle family, and is extremely rich in everything from essential fatty acids to amino acids to minerals.

How can burdock help your hair?

It significantly improves blood circulation on the scalp, which means that your hair follicles have more access to the nutrients that they need, resulting in faster hair growth.

When used as an oil, burdock can also help to soothe the scalp, relieving any irritations or other scalp conditions.

Burdock root

There are so many other botanicals out there that could really benefit your hair, so if you have a particular condition you are hoping to treat, it would definitely be worth delving deeper into the world of botanicals.

Don’t forget…

In addition to using these botanicals topically, you can also take many of them as oral supplements, thereby boosting the effects that the topical botanicals will have.

Lemon and Lime

Both of these citrus fruits are famous for their vitamin C content, and were used by the ancient Egyptians as a way to cleanse their hair.

While these fruits will not be able to replace a traditional shampoo, they make great treatments for those who have oily hair. Both lemons and limes contain astringent properties, meaning that they are able to clear away any excess oil.

Lemons and limes also have antiseptic and anti-fungal properties, meaning that they can help with scalp problems and dandruff.

Oatstraw

You likely already know that oats are great for your skin and hair, but do you know what oatstraw is?

Oatstraw refers to the dried tops from oat crops, and they contain all of the same compounds that the oats themselves do. 

Just like oats, oatstraw has incredible anti-inflammatory properties, and is also an extremely gentle ingredient. This makes oatstraw perfect for anyone that has an itchy scalp or dandruff.

Amla

Also known as the Indian gooseberry, amla contains quite a few antioxidants, including vitamin C.

Amla, or Indian gooseberry

Why does vitamin C matter?

Because this vitamin is essential for the production of collagen, which then helps to boost hair growth and strength.

Got a few gray strands?

Amla can help with this too.

If you cannot find any hair care products that contain this botanical, your next option is to purchase it in a powdered form. Mix this with some water to create a paste, and then apply this to your hair, just like a hair mask, for about half an hour, before rinsing it off.

Saw Palmetto

Saw palmetto is a plant that resembles a palm tree, but is much more low growing. The fruits that this tree produces are packed with phytosterols and fatty acids, meaning that they can bring the body a wide range of different benefits.

Saw palmetto is actually one of the most popular herbal remedies out there when it comes to hair loss.

Why?

Because it has the ability to stop testosterone from being converted into dihydrotestosterone.

Wondering why this matters?

Because dihydrotestosterone has been linked to hair loss, meaning that the inhibition of this not only prevents hair loss, but also encourages healthy and strong growth.

While there are medications out there that can also prevent the production of dihydrotestosterone, saw palmetto does this without any side effects, which is why this is often the botanical of choice for hair loss.

The Craziest Hairstyles Ever

$
0
0

There are many different bold and crazy hairstyles trending today, and these are always fun to do and look at.

Whether you take different elements from them to add to your own style, or are feeling daring enough to replicate one completely, here are some of the craziest hairstyles ever.

An Emphasized Bun

This crazy hairstyle is extremely high fashion and avant-garde, but can still be replicated in a more subtle way.

How?

Simply by toning down the bun and making it smaller, but keeping the placement the same.

Want to go all out with a giant bun?

You will likely need to add in some hair extensions, and will need to use quite a few accessories to keep everything in place. Nevertheless, while this style ma y take some time to create, there is no denying that it is definitely an attention-grabber.

Pretty in Pink

Many would not consider this look to be crazy, but that all depends on the shade of pink that you choose.

Not sure how to choose a shade?

Here are a few guidelines to keep in mind:

  • Fair Skin or Light Hair – a bright and crisp pink will work well for you, but so would a subtle pastel pink that looks more like an undertone than a main color
  • Olive Skin or Dark Hair – just about every shade of pink will work for you, whether you go for a soft and delicate rose or a dark magenta
  • Dark Skin – you can get away with going for a really bright and vivid shade of pink, such as a fuchsia or a hot pink, as these will contrast beautifully against your skin tone 

Once you have taken the plunge and gone pink, remember that you will need to use a shampoo and conditioner formulated for colored hair.

Wondering if this actually makes a difference?

Definitely, because these products will help to preserve the vibrancy of your hair color, whereas other shampoos will end up stripping your color off much faster.

In fact, there are shampoos that are formulated for specific colors too, so try to find one that is designed for the dye color you have chosen.

Looking for a shampoo that also contains SPF can be helpful in preserving your new hair color.

How?

Because the sun’s UV rays will end up fading your color, whereas an SPF shampoo will help to prevent this from happening.

Still can’t seem to find a good shampoo?

Often, grocery stores just don’t cut it when it comes to quality hair products for colored hair. If this is the case where you live, try visiting a hair salon as they will likely stock higher quality hair products, and will also be able to properly advise you on exactly what it is you need.

Princess Leia-Inspired

Princess Leia buns are truly iconic, and this makes them seem classic rather than crazy.

Whatever category you think they may fall under, this is a style that works well on many different face shapes, making it one well worth trying out.

Think this style will take ages to put together?

It may at first, but should not take longer than ten minutes once you have mastered the technique.

To create this style, begin by tightly tying a ponytail above each ear.

You will then need to twist your hair around each ponytail, making sure that the twist that you form looks absolutely perfect. Try to do this in one movement, flipping your hair around in the same direction, spiralling it round into a bun.

Of course, this perfection is not necessary if you are opting for a more casual look instead.

You will need numerous bobby pins to hold each bun in place, and can then even cover each bun with a transparent net to ensure that no hair goes astray.

Finish off your look with a spritz of a strong-hold hairspray.

Crazy Wigs

Wigs can be lots of fun to experiment with, because they allow you to try out many crazy styles without having to make any changes to your actual hair.

Never worn a wig before

You will generally have two choices:

  • Human Hair Wig – these tend to be quite expensive, and requires the same amount of maintenance as your actual hair does. However, it is extremely versatile and long-lasting
  • Synthetic Wig – while these do not require any maintenance, they are also not that versatile, but do tend to be much more affordable

Don’t forget…

The way in which you store your wig will make a huge difference to how long it lasts.

A wig stand is the best way to go, as this will help to hold the wig’s shape, but a wig net will also work well.

Do you need to wash your wig?

If you go for a human hair wig, then yes. With synthetic wigs, there are quite a few different synthetic fibers available, so you will need to check the care instructions for the specific wig that you choose. 

Ultra-Glam Updos

The complexity and level of detail in ultra-glam updos are definitely impressive, and so is the amount of time and patience needed in order to create a style such as this.

There is a certain beauty to these complex looks that make them tempting to try out, but just be aware that you will need to practice these types of styles quite a bit before you manage to master them.

It goes without saying that this would be more of a special occasion style than an everyday one, and will no doubt add such a unique dimension to your overall look.

Can’t seem to manipulate your hair in the right way?

Here are a few tips to help you to create the perfect updo:

  • You will need to use plenty of bobby pins, placing them with their wavy side against your hair, as this gives you the maximum amount of grip
  • To give your bobby pins even more grip, spray them with some hairspray before putting them into your hair 
  • Hair that is not freshly washed will be easier to manipulate, thanks to the build-up of your hair’s natural oils
  • If you have recently washed your hair, apply some dry shampoo to give it some extra hold and texture

Rainbow Hair

Pink and blue have already been mentioned, but if you cannot decide which color to go for, how about opting for rainbow hair instead?

From Katy Perry to Lena Dunham, this style has been seen on many different celebs, making it quite trendy too.

In order for you to really pull this look off, you will likely need to bleach your hair first, as well as cut it in a style that will work with the rainbow colors.

Streaks of Blue

Ever since Kylie Jenner sported vivid blue locks, this crazy trend has really taken off.

Want to give it a go?

Adding in blue streaks to your hair can be quite a lengthy process, depending on your hair color. Those who have darker colored hair will need to have their hair bleached first, whereas those who have naturally light hair may be able to get away with adding the blue on directly.

Whichever the case may be for you, it is important that you go to a professional for a style such as this.

Not sure whether or not you can pull this look off?

The secret to this look is all about the shade of blue that you choose, as well as the placement of your streaks

Make sure that you opt for shades of blue that complement your skin tone, making use of multiple shades to give your hair some extra dimension. 

While you may be tempted to go all out and dye all of your hair blue, keeping it slightly toned down by leaving your crown natural will help to highlight the blue and keep this style looking trendy rather than outrageous.

The Mohawk

If you are looking for a style that is crazy yet classic at the same time, then a mohawk is the way to go.

Wondering whether a mohawk would suit you?

It is likely that it will, since there are many different styles of mohawks out there:

  • Shaggy Mohawk – great for hair with lots of texture, and ideal for women with an oblong face shape
  • Curly Mohawk – makes hair look denser and thicker, and really suits women with diamond and oblong shaped faces
  • Braided Mohawk – features a braid on either side of the head, just above the ears. This adds extra volume to the sides of the face, making it especially complementary for those with a thin face 

Not quite brave enough to go for a mohawk?

You could always consider a faux hawk instead. This is similar to a mohawk, with the top of the hair styled in the same way, except more toned down. There is also more freedom when it comes to the sides of your hair, meaning that you can keep this longer if you wish.

Voluminous Curls

This is quite a fun, feminine look, and has a slightly vintage feel to it. While it is well-suited to special occasions, it can also be worn on an everyday basis, and will give a chic, sophisticated edge to just about any look.

For those of you who have long, thick hair, this style will work especially well

When it comes to actually creating this look…

You have two options available; using rollers or using a curling iron.

As with every hair styling tool out there, there are pros and cons to each of these.

Curling irons are quick and easy to use, although the process will take a bit more time for a style such as this. They are also extremely versatile when it comes to actually creating the curls, giving you the opportunity to precisely curl each section of hair in exactly the way you want it to move.

On the other hand, rollers enable you to simply style your hair and then leave it to set, meaning that there is less time and effort involved. They will also give you the maximum amount of volume, and tend to be the best option when you are curling your whole head of hair.

The Bow Bun

The bow bun is such a fun style, and is actually not that difficult to create, only taking a few minutes once you have gotten the technique mastered. 

This is a style that will work best for those with longer and thicker hair, as well as with hair that has not been freshly washed.

Want to give it a try?

Here are the steps to follow:

  • Gather all of your hair at the top of your head
  • Begin tying a ponytail, but do not pull your hair through the final loop. Instead, leave it creating its own little loop, with the ends pointing towards your forehead
  • Divide this loop into two sections
  • Take the ends of your hair and fold it through your two looped halves, as this will then create the center part of the bow
  • Secure these ends in your elastic band, keeping them tucked away towards the back of your head, so that they are not visible
  • Use your fingers to gently spread the bow out, until the placement of each loop is exactly how you want it
  • Finish the look off with a spritz of hairspray to hold everything in place 

It is always so much fun to experiment with crazy hairstyles, because even though you may think that you would never wear them out in public, you never know what may end up suiting you and complementing your features. From Princess Leia-inspired buns to crazy hair colors, these outrageous styles are definitely worth trying out when you want a hair change.


The Best Beach Wedding Hairstyles Ever

$
0
0

Thinking of a beach-proof ‘do that still packs a decent dose of glam? It might a little challenging, especially when you take into consideration all the outside factors that come with a seaside ceremony, such as wind, sand and probably a fair amount of sweat.

You’ll be relieved to hear that there is still a myriad of gorgeous beach-friendly bridal ‘dos that will not only withstand any and all coastal conditions, but also look ultra glamorous!

Triple Braid

Getting married at the beach is the ideal opportunity to unleash your inner Aphrodite.

And what better way to do that than to sculpt your hair into gorgeous, Greek-inspired tresses that will perfectly compliment your seaside ceremony.

Best of all, this ‘do is super easy to pull off.

  1. Start with freshly washed hair. If you feel like you need more body to your strands, blast your hair with a touch of texturizing spray to give it more of a beachy feel.
  2. Once you’re happy with the volume, create a deep side part and section off a one-inch-wide strand at the front.
  3. Start French braiding, incorporating new hair every time you twist it, then stop about two to three inches down your shaft and continue braiding a classic braid. Secure it with an elastic band.
  4. Take out a strand of the same thickness just below it and repeat the previous step.
  5. Separate another section, this time on the opposite side of where you have parted your hair.
  6. Braid this section as well, then tie all three together at the back of your head using an inconspicuous elastic band.
  7. Secure your entire ‘do with medium-hold hairspray and your easy-as-peas Grecian look is complete.

Super-Sized Side Braid

Even though the side braid is one of those styles you can pull off in seconds just about any day, there are ways to add an extra dose of glam to this classic ‘do.

To begin with, start with fully dry hair.

If your hair has natural curl or frizz, you can give it a run through with a flat iron to make sure you have a smooth surface to work with.

  1. Create a deep side part and set aside one strand at the front to frame your face.
  2. Next, take the top section, split it into three smaller strands and begin to form a Dutch braid, by crossing the seconds under each other, as opposed to over (as is the case with French braids).
  3. Once you reach your neck, continue braiding into a classic braid and secure the end with a small elastic band one or two inches from the tips.
  4. Give the braid more fullness by carefully stretching out the twists, creating a flatter appearance.
  5. Grab a wide-barrel curling iron and style the front section that you set aside at the beginning.
  6. Top off the look by adding a flower or a hair accessory of your choice to the braid.

Low Up-Do with Twists

This gorgeous hairstyle features lush side twists and lots of volume that forms at the nape of the neck.

It can be a go-to bridal look if you want a fresh and romantic coif that requires zero braiding or hot tools.

To truly nail this look, you should start with volumized, slightly tousled locks.

You can achieve this by putting mousse in your hair while it’s still wet, then letting it air dry.

If it still needs more plumpness, add a touch of texturizing spray.

  1. Once you’ve locked in the right texture, part your hair in the middle.
  2. Make two sections at the front, then begin twisting them away from your face.
  3. When you’ve twisted each section to the back of your head, join them and secure the twists with an elastic band.
  4. Grab the rest of the hair and use your fingers to tuck it in behind the twists, making sure that the transition appears seamless.
  5. Use bobby pins to secure the hair to the back of your head.
  6. Once everything is in place, blast your do with a medium-hold hairspray to secure definition and longevity of your coif.

Loose Bun with Braids

If you’re debating what’s the perfect hairstyle to sport while you’re walking down the aisle, low up-dos are always a hit.

And this romantic number with two braids framing the style might be the perfect fit to rock on your special day.

Moreover, you don’t need to have Rapunzel-line hair to pull off this look – a shoulder-length bob will do the trick just as well. It also works if your hair is layered or if you’re currently sporting bangs.

  1. Start off with clean hair. Section of a thick strand of hair on each side of the face – this will serve as the base for your braids.
  2. Tie the rest of the hair into a low ponytail. Grab a bun donut and pull the ponytail through the hole. Wrap the hair around it and start twisting the donut to the nape of your neck.
  3. If there are any stray hairs poking out, use bobby pins to tuck them in behind the donut.
  4. Proceed to braid each of the section into classic three-strand braids.
  5. Tie each one with a mini elastic band, then flatten them out by stretching out the braids ever-so-gently.
  6. Pull each braid towards the bun, then secure them with bobby pins until you feel like you’re do is sturdy enough.
  7. Add a hair decoration of your liking and voila – this simple look is complete.

Knotted Half Up-do

If you’re not exactly a hair specialist, you might be inclined to think that achieving a glamourous bridal ‘do has to involve various hot tools, a host of styling product and, of course, a lot of hard work.

This is not always the case! You’d be surprised how easy it is to lock a beautiful, wedding-ready coif in a matter of minutes.

A great example is this romantic half up-do, which will be the perfect option for all the low-maintenance brides out there.

All you need to do is take out two thin strands of hair from the front, then twist them until they meet at the back of your head.

Cross the sections twice and secure the twist with a couple of bobby pins.

And that’s pretty much it! The perfect laissez-faire half up-do.

Of course, you always have the option of glamming up this simple do by grabbing a curling iron and styling the rest of your hair into loose, bouncy curls.

When you’re happy with the way your coif looks, give your hair an all-over spritz with medium-hold hairspray.

Simple Side Braid with Accessories

If you want to rock your hair at its full luscious length for your seaside nuptials, but worry about it looking a little too casual, there are ways to jazz up the long coif so it’s picture-perfect for your big day.

Start off by washing your hair and treating it with a nourishing conditioner. If your hair has a natural wave of bend, coat it with your favorite curl-defining product then blow-dry it using a diffuser to preserve the definition.

If you still have some frizz or uneven texture (or, alternatively, if your hair is completely straight), style it with a wide-barrel curling iron until you have a full mane of gorgeous, glossy curls.

  1. Section off a strand from the top of your head. Leave the one at the very front loose to frame your face.
  2. Proceed to create a three-strand Dutch braid by crossing the sections underneath each other.
  3. Once you’re halfway down, grab a bobby pin and secure the braid to the rest of your hair.
  4. Pull the braid by grabbing it from the sides to stretch it out and give it more volume.
  5. Add a hair accessory to conceal the bobby pin and add a touch of glam to your locks.
  6. Set your hard work with a spritz of hairspray and your side-swept braid is all done.

Half Up-do with a Waterfall Braid

Another way to create a more innovative look for long locks is to style them into beautiful cascading braids.

Since waterfall braids aren’t as widespread as their French or Dutch equivalents, this technique might seem daunting at first, but with a little bit of practice, you should be able to nail this look in no time.

To create this beautiful waterfall braid-adorned half up-do, start off by spritzing your locks with a heat protectant to shield it from styling-induced damage.

Next, grab a curling iron and begin curling each strand in alternate directions – this will give you mane more body and added texture.

  1. Once you’ve curled the entire hair, take a front section and divide it into three equal parts.
  2. Cross the three sections once, as if you were making a classic braid. At the next sequence, incorporate hair into your strands like you would do with a French braid.
  3. Instead of crossing the right section of your hair over the middle one, simple drop it so it hangs loose in between the two strands.
  4. Keep braiding your hair horizontally until you’ve reached the back of the head. Secure the braid with the bobby pin and let the unbraided part blend into the rest of your hair.
  5. Repeat the same process on the opposite side of your parting, creating a cascade until the two braids meet in the middle.
  6. Cross one braid over the other and secure it with bobby pins, so it appears as if they join onto each other.
  7. Give the entire look a spritz of hairspray and the waterfall brain up-do is complete.

Jazzed Up Lob

If you’re currently rocking the ever-popular bobs or lobs and are concerned that the lack of length might be standing in the way of achieving a luscious matrimonial ‘do, worry not!

There’s no reason why your fresh, shoulder-length crop can’t be just as romantic as waist-length locks.

An especially flattering wedding-ready style for short hair is the waterfall braid-adorned half up-do, which can add a touch of sophistication for every blushing beachside bride.

You can achieve this look by parting your hair on the side, then grabbing a portion of the hair from the thicker section to create a mini-waterfall braid. Once you reach the back of your hair, secure it with a bobby pin, then repeat the same on the other side of the parting.

When the two braids meet, join the ends and connect them with an elastic band.

If you want to add more va va voom to your locks, curl them before braiding the top part.

Full Low Bun with a Thick Braid

This stunning hairstyle features a low bun and a side braid with a lot of volume and gloss.

While your hair is still wet, coat your locks with your favorite shine-boosting product to make sure your hair is extra silky.

Wait until it’s fully dry (or use a blow-dryer for more efficiency), then grab a decent-sized section from the very front.

  1. Starting from the top part, split the portion of the strand into three equal section, then begin creating a Dutch braid, crossing each section underneath the one next to it, incorporating more hair into the braid each time you twist it.
  2. Keep going until you reach the ear, then braid the rest of the hair like you would normally.
  3. Tie the very end with a small elastic band.
  4. Gently pull each section of the braid to make it appear more voluminous.
  5. Next, tie the rest of the hair into a low ponytail.
  6. Slip the ponytail into a donut bun and begin twisting it until it is securely placed at the nape of your neck.
  7. Grab the braid and sweep it underneath the bun, tucking the ends under it using bobby pins.
  8. Add accessories behind the bun and your tropical bridal coif is all set.

As you can see, it’s super easy to achieve a tried and true bridal coif that will not only look beautiful against an ocean backdrop, but also stay put while you’re out there enjoying one of the most important events in your life.

The Best Party Hairstyles for Fall

$
0
0

While it can sometimes be fun spending hours crafting an extravagant hairstyle for a party, there will always be those times when you need a quicker and easier option. 

These eight party hairstyles are not only that, but will also inject plenty of fun and personality into your look. 

A Sleek High Ponytail

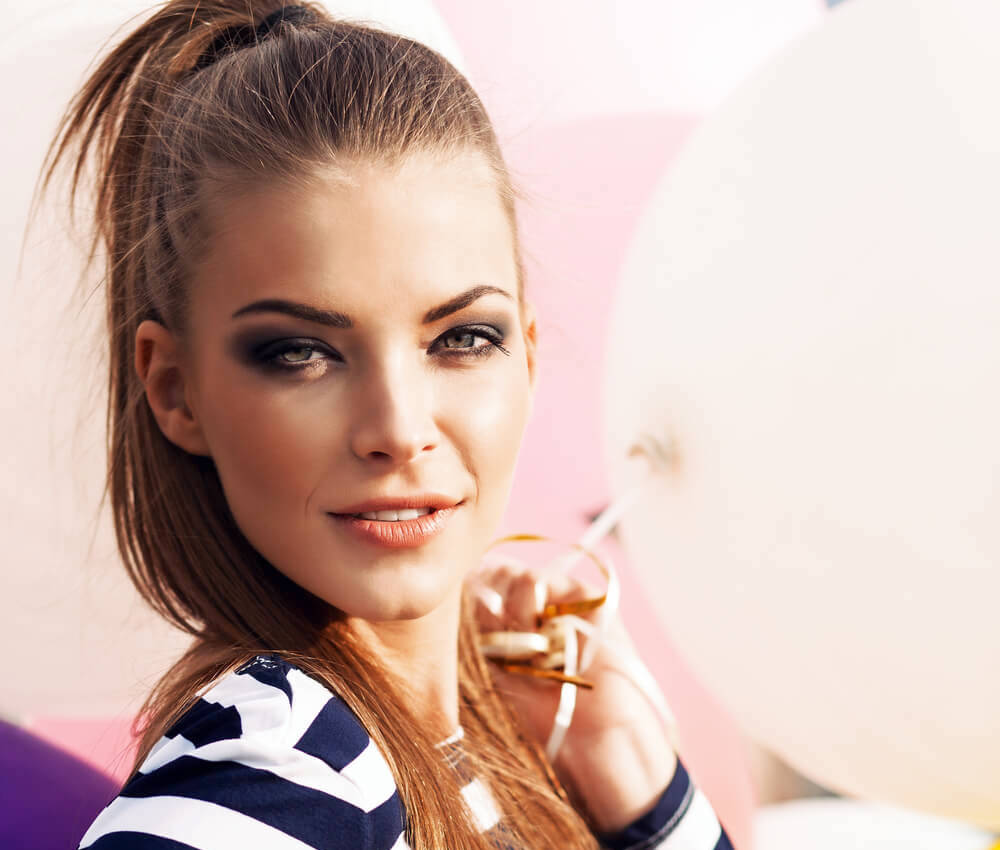
Woman with high ponytail holding colourful balloons

For a fuss-free but incredibly stylish party hairstyle, a sleek high ponytail is the way to go. 

Now, this may seem like an easy look to put together, but creating the perfect ponytail can actually be quite challenging. Even when you take great pains to gather your hair into a sleek pony, unwanted bumps and stray strands will often appear before you are done tying the ponytail off. 

So, how do you avoid that? 

Well, it starts when you are brushing your hair. Rather than brushing it downwards, make sure that you are brushing your hair in the direction of where you want your ponytail to lie. This will help to get your hair looking sleek once it is tied up. 

Then, brush your hair upwards into a ponytail, and use a hair bungee to tie this off. 

Why a hair bungee? 

Because not only will this be better for holding your ponytail in place throughout your party, but it also gives you more control when it comes to how tight you want your ponytail to be.

Never used a hair bungee before? 

They look like bungee cords, with two hooks. The first hooks into your hair, after which you then wrap the cord around your ponytail, before hooking the second hook in to anchor the cord in place. 

If you have any stray strands, use a couple of bobby pins to keep these down. 

Once you have created the perfect pony, don’t forget to top this off with a spritz of hairspray to hold everything in place. 

A Braided Bun

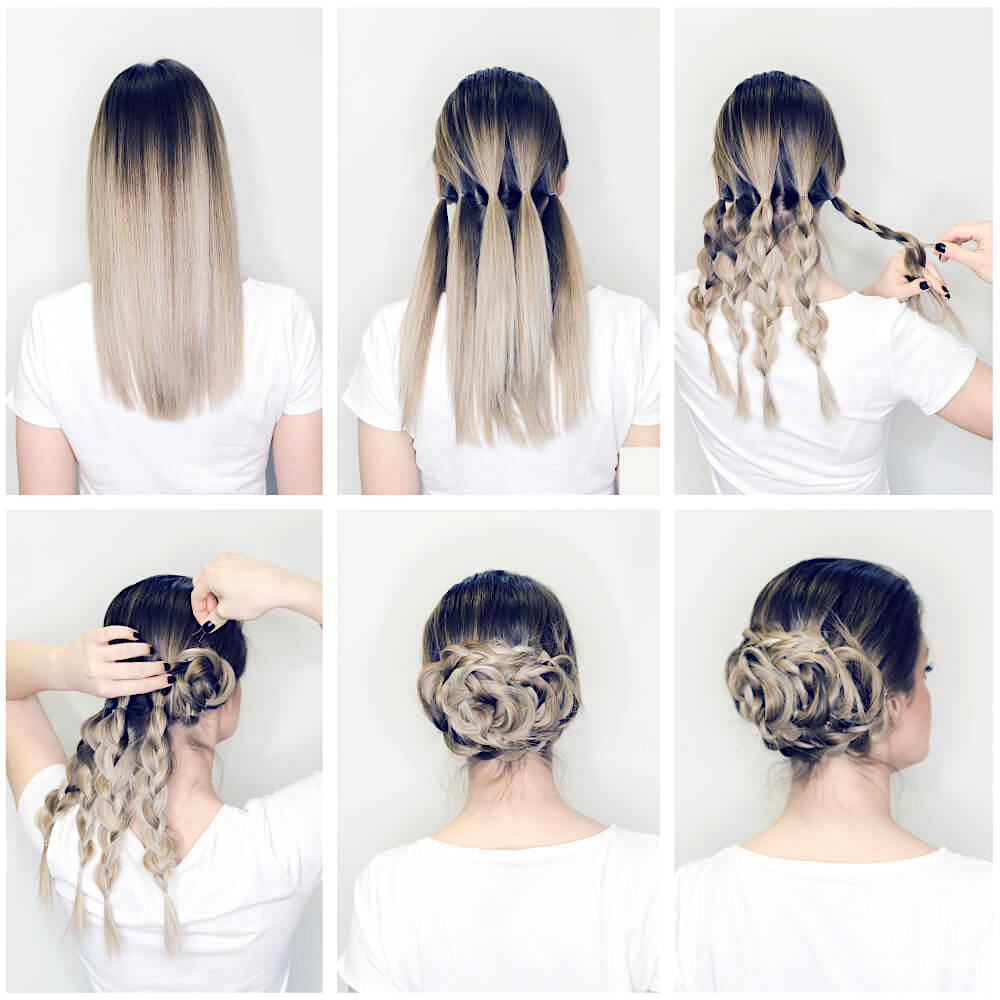
Hairstyle tutorial on braided bun

This hairstyle looks quite complicated, but it is actually quite easy to put together. 

Begin by brushing your hair out, ensuring that there aren’t any tangles. 

Then, tie your hair into multiple ponytails. The amount of ponytails you create depends on the thickness of your hair, but try to aim for between six and eight. Tie each of these ponytails off at the top. 

You will now need to braid each of the ponytails, and tie them off at the bottom with a clear elastic band. 

Then, gather together some bobby pins. Take each braid and wrap it around itself to form a small bun, before pinning this into place. Keep repeating these steps, until all of the smaller buns have turned into one larger bun. 

Finish with some hairspray to keep the look together. 

Accessorized Curls

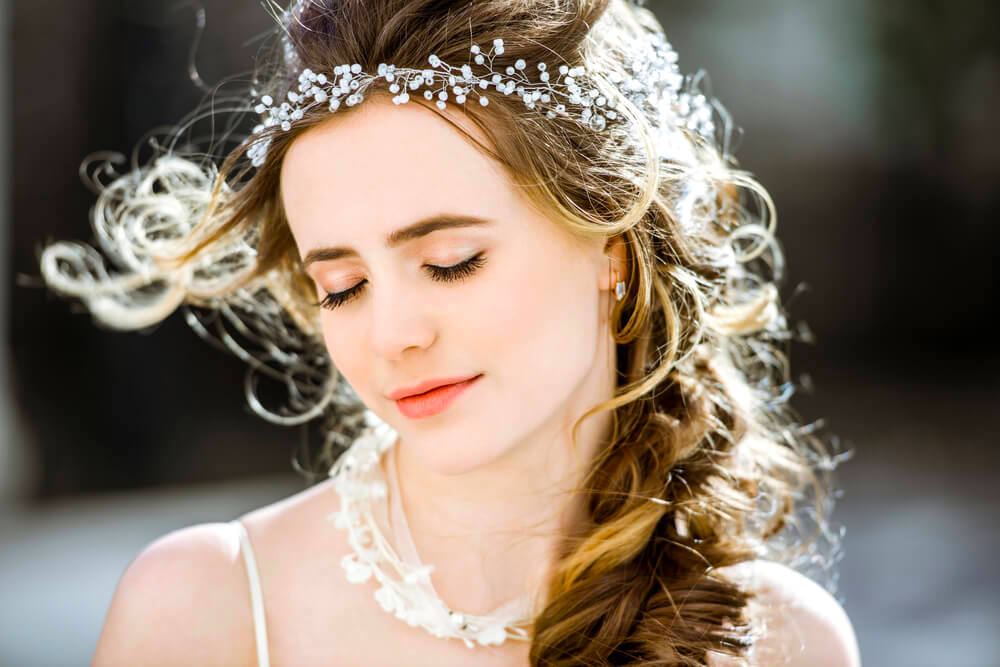
Young woman accessories in her curly braid

If you really don’t have much time to get your hair ready for a party, hair accessories are a great way to jazz up your hair, no matter what your natural hair type or hairstyle may be. 

Need some accessory inspiration? 

Here are a few glam accessories to try out on your hair: 

  • Jewelled hair clips 
  • Embellished crowns and headbands 
  • Bows 
  • Hair scarves
  • Ribbons 
  • Floral headdresses 
  • Lacy headbands 
  • Feathers

It always helps to have a good selection of hair accessories at home, so that you can quickly and easily find one that will work with the rest of your party outfit. 

A Top Knot

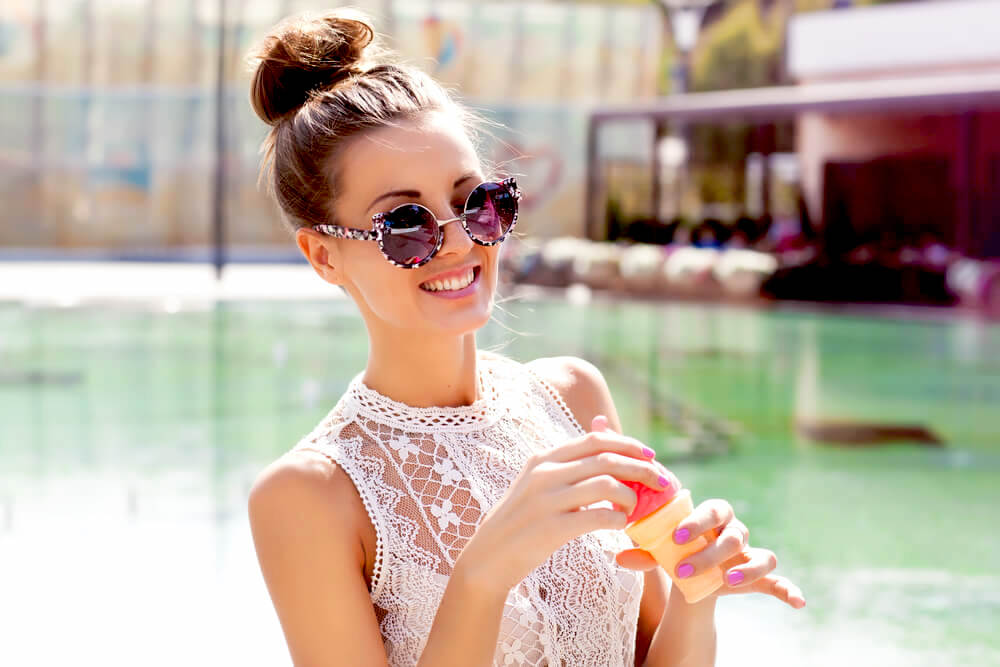
Smiling woman with sunglasses and a high bun by the pool

Top knots are simple and casual, making them great for a daytime party. 

When it comes to creating a top knot, you have two main options…

The first is to go for a sleek top knot

Your best bet for perfecting this is by following the tips mentioned earlier for a sleek ponytail, except that you would need to form a bun rather than a ponytail. 

Alternatively, if you would like some extra volume and movement, go for a textured top knot. 

If your hair is naturally wavy or curly, then any top knot you create will automatically have some texture to it. 

For those with straight hair…

Use a curling iron to add some curls to random sections of your hair. Don’t worry about it looking perfect, since you’re going to be tying it up anyway. 

Whichever top knot you go for, make sure that you keep any flyaway strands down by using some bobby pins. 

One final tip…

A top knot is always so much easier to create on second day hair, meaning hair that has been washed the day before, rather than the same day. If you have already washed your hair and need to put together a top knot, try running some dry shampoo through your strands. This will give your hair some extra texture, and make it so much easier to manipulate.

Clip-In Bangs

Close-up portrait of woman with long blonde hair in braids and straight hair bangs

Bangs are such a good way to completely transform your look, but it’s understandable if you don’t feel quite ready to take the plunge when it comes to having bangs cut into your hair, especially if it takes you a while to grow them back out. Not only that, but maintaining bangs can also be quite time-consuming, as well as costly with all of the extra trims you will need. 

Fortunately, you now have another option…

Clip-in bangs are becoming increasingly popular, thanks to the way in which the newer styles look completely natural once they have been clipped into the hair. 

The key to making sure that the bangs blend in with the rest of your hair well is picking the correct shade. Clip-in bangs are usually available in quite a wide range of different shades, so make sure that you choose one that perfectly matches your hair color. 

Clipping the bangs into your hair is quite an easy process…

Here are the steps to follow, although these may vary slightly depending on the bangs you have purchased:

  • Create a center part, as this will help the bangs to sit flat against your head. It also makes it easier to keep your hair out of your face while you are putting the bangs in 
  • Spray the bangs with some dry shampoo to take away the unnatural sheen that synthetic hairs tend to have 
  • Move the bangs back up towards the crown of your head, along your part, until you have found a position that enables the bangs to fall just above your brows. This helps to hide the seam of the bangs 
  • Use the clips on the underside of your clip-in bangs to secure the bangs to your hair. Bangs that have longer strands on the sides are always best, as these will help the bangs to blend into your natural hair

A Temporary Dye

Woman with bright pink curly hair, touching her hair outdoors

While not technically a hairstyle, using a temporary dye is a great way to give your hair some extra vibrancy for a party. 

These dyes are so easy to apply, and you only need to leave them in your hair for 30 minutes or so. 

Pinks, lilacs, greens and blues tend to be the most popular colors when it comes to temporary hair dyes for parties, but just about every color under the sun is available in hair dye form, so feel free to get creative. 

Can’t find the color you want? 

Some brands let you be the artist when it comes to creating the exact shade you’re looking for. White dye, along with a range of core colors, can be purchased. You can then mix these dyes together so that you can completely customize your hair dye shade

How long do these dyes last for? 

It depends on the dye you purchase. Some will wash out as soon as they come into contact with water, while others may last for a few washes. 

Once your hair has been dyed, it will likely already make quite the statement, so you won’t need to worry too much about the style that you end up choosing. Simple tends to be the way to go here, as you don’t want to end up looking over-the-top. 

Glamorous Curls

Smiling young woman with soft curly hair

Glam curls are so perfectly suited to a party, not only adding sophistication to your look, but also a mysterious and sexy edge.

The best way to create this look is with a curling iron, but the method does differ depending on how straight or curly your hair naturally is.

Here are a few tips:

  • Straight Hair – add in some texture first with a sea-salt spray, before blow drying your hair. Use a quarter inch curling iron, as your hair will need smaller curls in order for them to last
  • Wavy Hair – add some mousse into your hair while it is still wet, before blow drying it with the help of a flat brush. A half inch curling iron will be best for your hair type
  • Curly Hair – begin with a smoothing cream, before blow drying your hair with a round brush to keep it smooth. Finish off with a blast of cool air, as this will help to close your hair follicles and reduce frizz

When it comes to actually curling your hair…

Glam curls always look best with a deep side part, so make sure that you create this first.

Then, divide your hair into four sections:

  • Front center
  • Back center
  • Left
  • Right

Begin with the front center section, curling your hair from ear level before pinning each curl to help it set. Repeat this on both sides, before moving to the back.

One thing to keep in mind is that you don’t need to pin up the curls you create at the back of your head.

Why?

Because this will end up creating too much volume. Glam curls always look best when the curls at the back are slightly looser.

Once your curls are cool and have set, remove the clips and gently run a hair brush through your hair.

If you notice any frizz or flyaway strands at your crown, use a hair straightener to smooth this out.

Finish off with a serum to add some shine.

Do your curls usually end up unravelling quite quickly?

Try this…

Apply some hairspray to your hair before curling it, as this will really help your curls to stay in place.

Low and Loose Pigtail Braids

Young blonde woman with rose-tinted sunglasses and loose pigtail braids

Loose and low pigtail braids are incredibly cute, but don’t look stylish, making this childlike look one that you can rock at any age. 

This hairstyle doesn’t take much time at all to put together, simply requiring two braids being created at either side of your head. 

This is an easy style to customize, not only in terms of how low down your head you begin you braids, but also when it comes to how tight or loose your braids are. 

For those of you who don’t enjoy braiding hair, a regular three-strand braid is going to be the quickest and easiest for you. 

However, for those of you who want something a little more complicated, here are a few braid types that work particularly well with pigtail braids: 

When creating your braid…

You may be tempted to braid it loosely to begin with, but you should actually be doing the opposite. 

Braids that are braided loosely will end up unravelling quite quickly. A better option would be to braid it tightly to begin with, and then use your fingertips to loosen it up a bit. 

A finishing cream can also help to set your loosened strands in place. 

Don’t forget, practice makes perfect when it comes to braids, so don’t give up if you can’t achieve the perfect look the first time around. 

A party hairstyle doesn’t have to take hours to create. Each of these styles can be put together so quickly, and will have you looking party-ready in no time at all. 

8 Fun Ways to Style Super Curly Hair

$
0
0

With so much volume and texture, super-curly hair can sometimes be quite difficult to style. 

If you are stuck for ideas on what to do with your locks, here are eight ways to style your curly hair. 

A Deep Side Part

One of the advantages to having super-curly hair is all of the volume that this comes with. Volume is something that so many strive hard to achieve, but those with curly hair naturally have quite a bit of this. 

So, why not make the most of it? 

While a deep side part is flattering on just about everyone, it really emphasizes the natural volume that super-curly hair has. 

Want to know the secret to achieving the perfect deep side part? 

Part your hair while it is still wet, as this gives it some extra staying power. Use a rattail comb to do this, placing this on your hairline so that it is in line with the arch of your eyebrow. 

Why here? 

Because this is where it will be most flattering. 

Once you have created your part, comb a leave-in conditioner through your hair and apply a curl cream, as this will help to give your curls some definition. Once your hair has dried, whether you have left it to air dry or have dried it yourself, use a small amount of a defining serum on the ends of your hair, as this will help to prevent your curls from clumping together, giving them some more definition. 

Get Creative with Braids

There are so many different types of braids out there, enabling you to really get creative when it comes to putting together a braided hair style. The great thing about braids is that they work so well with curly hair, providing you with a chic, stylish and practical way to keep your hair back and out of your face. 

Not so good at braiding? 

The easiest one to get started with is the three strand braid. 

The main downside to this simple braid is the fact that it can sometimes end up frizzy, but this is still the braid to begin with if you want to start teaching yourself the more complicated braids. 

Speaking of complicated braids…

You have likely already heard of the French braid, and perhaps even the Dutch braid (both of which are great for curly hair), but how about the four or five strand braid, or even the seven strand braid? 

Yes, these can be quite tricky, and you will probably have to watch quite a few online tutorial videos to master it, but the effort will be worth it. 

Another one to look into is the waterfall braid, which enjoys even more texture and movement when created with curly hair. 

Low Bun with a Scarf

Having a bad hair day and need a chic way to hide it? 

This style is absolutely perfect for that. 

Unless your hair is extremely short, just about everyone can tie together a low bun. 

Of course, this style can often appear quite drab and boring, so this is where the scarf comes in…

Tying a scarf around your head will instantly perk your entire look up. Since the bun is behind the scarf, as well as low down, tying the scarf into a knot or a bow at the top of your head will help to balance this look out. 

Wondering how you should tie the scarf? 

There are so many options you could go for, such as: 

  • A huge bow – place the scarf against the nape of your neck and pull the ends upwards to the front of your head. Tie this into a knot before folding the ends in to create a bow shape. Tuck the ends into the bow to hide them 
  • Twisted – pull the scarf around your head so that the ends meet at the top front. Instead of tying a knot, twist the front ends together continuously until you run out of fabric, and then tuck the ends into the scarf to hide them 
  • Bunny ears – this method makes use of the popular shoe-tying technique to create a fun bunny ear bow
  • Space buns –these quirky double buns have been so trendy lately, and will be explained more further down 

Since the scarf takes centerstage in this style, this is a great time to experiment with bold colors, as well as prints and patterns, incorporating new and exciting features into your wardrobe. 

Half Up, Half Down

The half up half down style is a classic one, and is a great way for those with curly hair to keep their hair back off their face, without having to fully tie it up.

While a ponytail may be the most obvious way to go about creating a half up half down style, you can actually get pretty creative with this one. 

How? 

Try a half bun instead of a half ponytail, or even half braids. A twisted halo braid is also a unique take on this style, and is a beautiful way to frame the face.

Worried that the half of your hair that is down will end up getting frizzy? 

There are a few ways in which you can overcome the frizz, such as: 

  • Use plenty of conditioner after each wash, along with a deep conditioner once a week 
  • Avoid rubbing at your hair with a towel, gently squeezing it dry instead 
  • Leave your hair to air dry, or use a hooded dryer or a diffuser when drying your hair 
  • Use a boar bristle brush to brush your hair, as this helps to distribute the natural oils from your scalp down towards the ends of your hair. This is a process that naturally takes longer with curly hair, but is something that can really help to reduce frizz 
  • Coat the surface of your hair with a pomade, making sure to use this sparingly so that your natural curls can still be see

Space Buns

From Ariana Grande to Miley Cyrus, space buns have been all the rage lately, with so many celebs sporting this style. 

Due to the tight nature of this style, and the way in which it keeps your hair twisted and tied out of place, this is a great hairstyle for super-curly hair. 

Smiling giggling woman with two hair buns

Want to know how to create this style? 

Begin by brushing your hair and combing in a middle part with a rattail comb. Make sure that this part runs all the way down from the top of your forehead to the nape of your neck. 

Then, create two pigtails, placing them as high up or as low down on your head as you want. It is always worth experimenting with different positions to see which suit you best. 

Take one of your pigtails and twist this away from your face into a rope, doing this quite tightly in order to keep all of your curly strands in place. Coil the rope up so that you have formed a bun, tucking the ends underneath, and then use a hair tie to secure this into a place. Repeat these steps with your other pigtail. 

Since your hair is super-curly, you may also need to add in a few bobby pins to help keep this style in place. 

Love this look? 

Try taking it a step further by creating braided space buns. All you need to do for this style is braid your hair after you have divided it into pigtails, before twisting these braids up into a bun. Again, this can be customized even more with the type of braid you choose. A three strand braid would be the easiest, but a five strand braid would give this look so much more texture. 

Three Twisted Buns

This style is so easy to put together, and has such an edge of sophistication about it. 

It is similar to the space bun style mentioned above, but instead of just two buns, this one features three. 

Of course, this would look quite comical if placed at the top of your head, which is why these buns should always be low down, close to the nape of your neck. 

All you need to do is separate your hair into three sections. Take each section from the top and twist it down, making sure that you are directing this away from your face. Wrap this section around itself to form the bun, and then either tie it or pin it in place.

You will probably need to top this look with some hairspray in order to make sure that no strands stray from any of the buns. 

If you want to minimize volume at the top of your head, consider pairing these buns with a headband, or even a scarf. 

Topped with Flowers

Boho-inspired styles are still on trend, and curly hair topped with flowers adheres to this perfectly. 

This is a look that has such a carefree appeal to it, so even if your hair is prone to frizzing, it won’t really matter. 

Wondering how to actually incorporate flowers into your hair? 

Well, floral crowns are always popular, but these do often tend to be too much for every day wear. 

Instead, try wearing some floral pins at the side of your head, just above your ear. Pair this with a deep side part for maximum impact. 

For a more subtle approach, scattering some small blossoms through your hair will give you such a delicate and feminine look. Daisies are perfect for this, as are wildflower blooms, or you could always mix and match different flowers. Just make sure that you pick the right sized flower in relation to your curls – flowers that are too small may end up getting drowned out by large curls. 

Want to go with real flowers so that you can make use of their beautiful fragrance too? 

Roses would be the obvious choice, while gardenias also smell heavenly. Peonies have more of a delicate scent, while the fragrance of a hyacinth is much punchier. 

Inverse Ponytail

Love the simplicity and ease of a ponytail? 

An inverse ponytail will only take a few more seconds to create, but will show off your curls in a much more interesting way. 

Also known as the inside out ponytail or the folded ponytail, you can quickly create this style by following these steps: 

  • Gather your hair into a standard ponytail. Whether you opt for a high ponytail or a low ponytail is completely up to you 
  • After tying your ponytail off with an elastic band, use your fingers to form a hole in your hair just above the band. Try to make sure that this hole is as close to the band as you can make it 
  • Keep one hand in the hole, making sure that the hair here remains separated apart, and use your other hand to take your ponytail up and through the hole, pulling it downwards from the inside 
  • You can then adjust the ponytail, making it tighter or looser, before spritzing on some hairspray to keep all of your strands in place 

Love this idea? 

You can try creating an inverse bun next. 

Rather than pulling the ponytail all the way through the hole, stop halfway, and then use some bobby pins to secure the ends of the ponytail to its base. You will likely need to tighten the bun after making it, especially with super-curly hair.

Styling super-curly hair can be difficult, but if you have the right techniques and the right products, your job immediately becomes so much easier. Whether you want to go for something elaborate and complex, such as a five strand braid, or want to keep it simple with a low bun topped with a scarf, these eight styles will provide plenty of inspiration. Remember, always have fun with your hair, and allow your personality to really come through in the styles that you choose. 

Viewing all 60 articles
Browse latest View live


Latest Images